Tuesday, April 10, 2012

Cathedral Windows Tote Bag Tutorial


Cathedral Windows Tote Bag Tutorial

Supplies;
1 yd outer fabric
½ yd lining fabric
1 FQ solid fabric (for windows and border)
½ yd fusible fleece
1 yd woven fusible interfacing

Directions:
Cut from following:

Lining fabric
1- 18” X 31.5” piece

Outer fabric
4- 8” squares
1- 2.5” X 9” piece
1- 7.5” X 9” piece
1- 5” X 18” piece
1- 18” X 18.5” piece
2- 5” X 36” pieces (Straps)

Solid FQ
8- 2” squares (for windows)
2- 1”X 8” strips
2- 1” X 9” strips

Fusible Fleece
1- 18” X 31.5” piece

Woven Fusible Interfacing
2- 5” X 36” pieces

Assembling Outside of the Bag:
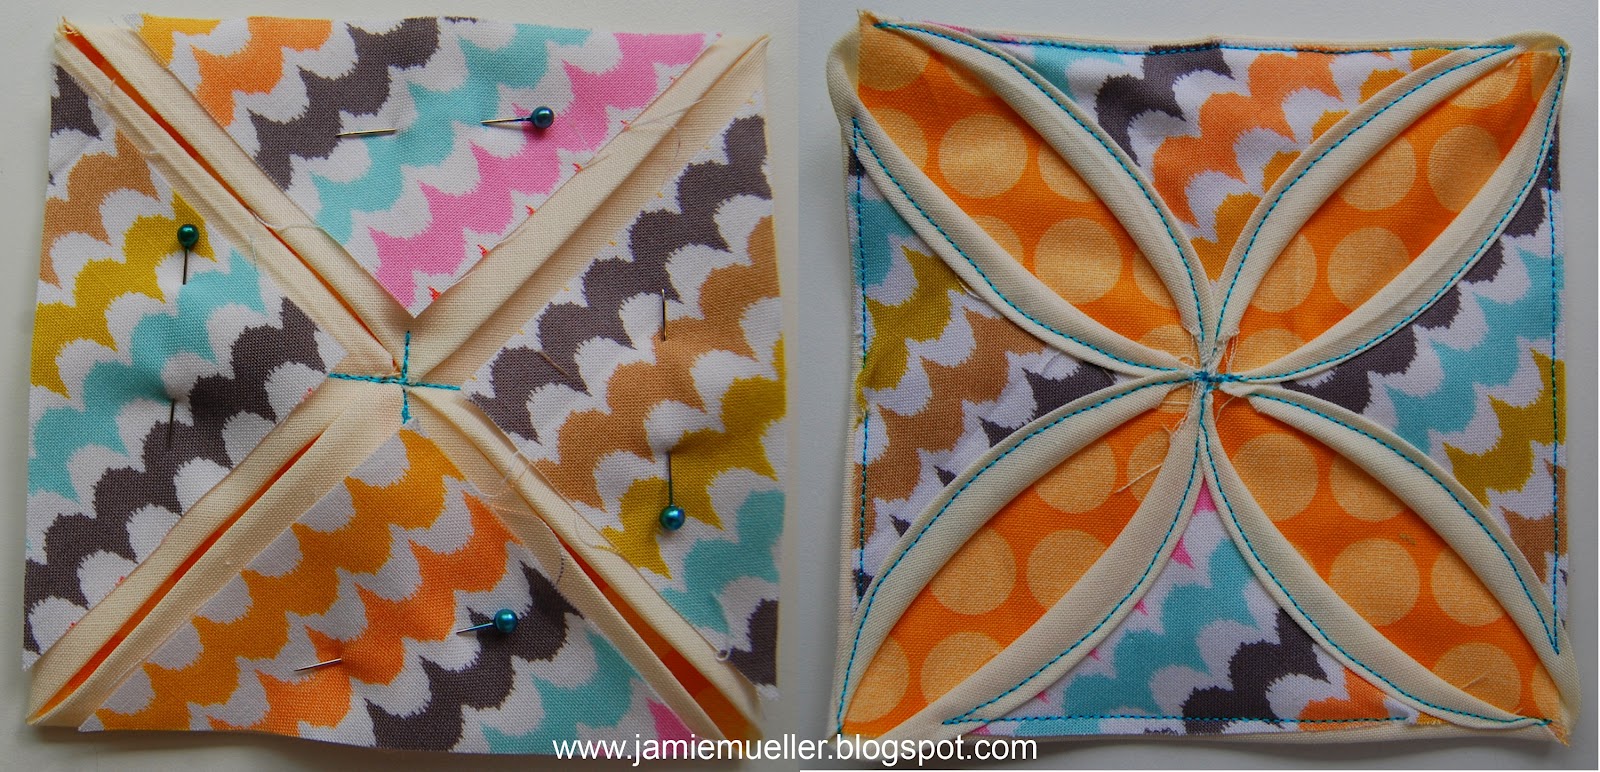
1. Follow the Cathedral Windows Basics Tutorial HERE using the size requirements listed below:
8” solid squares (I used the same printed fabric as the outer fabric of bag)
2” window squares (I used solids for these)

2.  Once your CW piece is made, we want to box it in with borders so it stands out on our bag.  Take the two solid 1” X 8” strips and sew one to the top and one to the bottom of the CW piece.  Repeat with the 1” X 9” strips to each side of CW piece.


3.  From the outer fabric, take 7.5” X 9” piece and sew to the top of CW piece. Then, sew the 2.5” X 9” piece to the bottom of CW piece.


4. Next, sew 5” X 18” piece to the left of CW piece and then sew 18” X 18.5” piece on the right side of CW piece. The outside of your bag is finished.


5.  Take the 18” X 31.5” fusible fleece piece and iron on to the wrong side of the outside bag piece.

 
Straps:
1. Iron on the woven fusible interfacing pieces on the wrong side of each strap piece.

2. Fold one strap piece in half lengthwise to get a crease in the center. Open and fold each long side to center crease and then fold in half lengthwise.  Topstitch to secure strap.  Repeat with second strap.


Pinning Straps:
1. Take your outside bag piece and lay flat.  On the top side measures 5” over from left and mark it.  Then, measure 12” over from the left and mark it.  Pin one strap at those two marks, making sure your strap does not get twisted.  (I like to have my two topstitching marks on my straps facing towards the center of the two marks. Repeat with the right side of bag.  Baste straps in place using a ¼” seam allowance.


Assembling Bag:
1. With right sides together match one of the 31 1/2” sides of the lining and outside pieces. Sew using a ½” seam allowance. Press seam toward lining.


2. Fold lengthwise in half as shown. Pin all 3 sides. Using a ½” seam allowance, sew all 3 sides leaving a 2”-3” opening in the lining for turning.


3. Trim corners being careful not to cut through stitching. Turn right side out through opening in lining and push out corners.
4. Stitch the lining opening closed. Push the lining into the quilted section of bag.


5. Press the top edge of bag and topstitch ⅛”and ¼” from the top edge of bag.


Your Cathedral Windows Tote Bag is finished!! Enjoy! Don’t forget to add your photos to the Flickr Group for a chance to win awesome prizes or Link up below!

Monday, April 9, 2012

Cathedral Windows Ornament Tutorial

Guest Blogger: Jill from Constantly Quilting

My mom wanted to join in on all of the Cathedral Windows fun and created a fun, quick project!  Hop on over to her blog and check out this cute ornament tutorial!  Thanks Mom for the cute idea!


As always, if you make one....or ten, because they're so fun, make sure you add it to my Flickr Group or Link up below so you will be entered in the giveaway for a chance to win a lot of awesome prizes!!

Cathedral Windows Turtle Stuffed Animal

Cathedral Windows Turtle Stuffed Animal or Large Pincushion

Supplies:
1 FQ of solid fabric (used for 1- 18"solid square and head, tail, & feet pieces)
1- 9" inner peak-a-boo square
2-7" window squares
1-18" backing square
stuffing
Coordinating thread
Hand sewing needle

Directions:
Follow the Cathedral Windows Basics Tutorial HERE  including the sewing embellishment (peak-a-boo) using the size requirements listed below:
*Size Requirements for Cathedral Windows Turtle:
18"solid square
7 " window square
9" inner square
You will only need one folded square.
Assembling the Turtle:
1.  Cut 10 pieces for feet and tail and 2 pieces for head.

2. Take two pieces and with right sides together sew all the way around leaving the bottom open for stuffing.  Stuff. Repeat until you have one head, four feet and one tail.

3. Pin head, feet and tail in place.
 4. With backing square and CW square (with head, feet and tail pinned in place) right sides together (RST) sew all the way around the squares leaving about a 2" opening for turning. 
5. Trim off corners being careful not to cut stitching.

6. Turn turtle right side out and stuff as desired. Hand sew the opening closed. Need help sewing your turtle closed? Check out my Mom's Ladder Stitch Video Tutorial over on her blog! It's a great, detailed tutorial and you won't see your stitches afterwards!

Now your Turtle is finished!  Enjoy

Don't forget to add photos to the Flickr Group or Link up below!!

Friday, April 6, 2012

Cathedral Windows Coaster Tutorial


Cathedral Windows Coasters Tutorial
Supplies: to make a set of four
4-8" squares
8-2" window squares
4-4" inner (peak-a-boo) squares
4-4" squares of batting (great for leftovers from quilts!)
Coordinating Thread

Directions:
Follow the Cathedral Windows Basics Tutorial HERE including the sewing embellishment (peak-a-boo) using the size requirements listed below:
*Size Requirements for Cathedral Windows Coasters
4" solid squares
2" window squares
4" inner peak-a-boo squares

1. You will make single cathedral windows squares. 
The supplies above are to make four of them, but you can make as many as you wish.  I also played around with using printed fabric for my "solid squares" and love the look of them!

2. Before stitching, during the peak-a-book/embellishment step layer a square of batting between the folded square and fabric square.  Sorry I forgot to take a photo, but it's basically like making a quilt sandwich when you machine quilt.  Put the batting square underneath the fabric square of the same size!  Make sense?  The batting will make the coasters thicker and more absorbent for the condensation.

3.  Instead of using a straight stitch, I like to use a zig zag stitch on both sides to make them lay flat and be more sturdy. See photos:


I sew a zig zag stitch on both sides of the windows so they lay flat.  This will help glasses not fall over when you place them on top.


I love the back of the coasters, it looks like you quilted them!


Your coasters are finished, easy peasy and fast!  Don't forget to add photos to my Flickr Group or Link up below!!

Thursday, April 5, 2012

Cathedral Windows Pincushion Tutorial #2

Cathedral Windows Pincushion #2 Tutorial


Supplies:
4- 6" squares
8- 1 3/4" window squares
4- 3" inner (peak-a-boo)squares
1- 6" backing square
Stuffing
1 Button for embellishment
Coordinating thread
Hand sewing needle

Directions:
Follow the Cathedral Windows Basics Tutorial HERE including the sewing embellishment (peak-a-boo) using the size requirements listed below:
*Size Requirements for Cathedral Windows Pincushion #2:
6"solid squares
1 3/4" window square
3" inner square
You will make a four patch just like in the Cathedral Windows Basics Tutorial (just smaller).


Assembling the Pincushion:
1. With backing square and CW square right sides together (RST) sew all the way around the squares leaving about a 2" opening for turning.

2. Trim off corners being careful not to cut stitching.

3. Turn pincushion right side out and stuff as desired. Hand sew the opening closed.
Need help sewing your pincushion closed? Check out my Mom's Ladder Stitch Video Tutorial over on her blog! It's a great, detailed tutorial and you won't see your stitches afterwards!

Adding a Button to your Pincushion:
1. With hand sewing needle and thread, start with a knot of top side of pincushion, close to the center.
2. Slide button on thread and cut off extra thread by the knot. (button will cover knot).
3. Bring thread through the other hole in the button and push through to the bottom of pincushion.
4. Pinch pincushion and repeat until button is secure.
See photo:


Your Cathedral Windows Pincushion is finished! I can't wait to see yours! Here are photos of mine that I've made! (FYI: the snow photos are older and I didn't just make them, just incase you're wondering where I live when there is snow in April!)


Don't forget to add photos to my Flickr Group or Link up at the below!


Wednesday, April 4, 2012

Cathedral Windows Pincushion #1 Tutorial


Cathedral Windows Pincushion #1 Tutorial
*this entire pincushion is a great scrap buster!

Supplies: to make a 5" pincushion
1- 10" square (solid fabric)
1-5" inner square (for peak-a-boo)
2-3" window squares
1-5" square for backing
stuffing (any stuffing will do, just use what you have on hand or your favorite kind)
1 Button for embellishment
Coordinating thread
Hand sewing needle

Directions:
Follow the Cathedral Windows Basics Tutorial HERE including the sewing embellishment (peak-a-boo) using the size requirements listed below:
*Size Requirements for Cathedral Windows Pincusion #1:
10"solid square
3 " window square
5" inner square
You will only need one folded square.


Assembling the Pincushion:
1. With backing square and CW square right sides together (RST) sew all the way around the squares leaving about a 2" opening for turning. 
2. Trim off corners being careful not to cut stitching. 


3. Turn pincushion right side out and stuff as desired.  Hand sew the opening closed.  Need help sewing your pincushion closed?  Check out my Mom's Ladder Stitch video tutorial over on her blog! It's a great, detailed tutorial and you won't see your stitches afterwards!


Adding a Button to your Pincushion:
1. With hand sewing needle and thread, start with a knot of top side of pincushion, close to the center.
2. Slide button on thread and cut off extra thread by the knot. (button will cover knot).
3. Bring thread through the other hole in the button and push through to the bottom of pincushion.
4. Pinch pincushion and repeat until button is secure.
See photo:


Your Cathedral Windows Pincushion is finished!  Here are some photos of my finished Pincushion! I can't wait to see yours!


Don't forget to add your completed photos to the Flickr Group or link up below!

Tuesday, April 3, 2012

Cathedral Windows Pillow Tutorial

Cathedral Windows Pillow Tutorial

Supplies: *to make an 18" square pillow
1 yard solid fabric
3/4 yd border and backing fabric
18- different 3 1/4" squares for windows (great for scraps)
9-5 1/4" inner squares (peak-a-boo option, I did not do this in the tutorial, but look here for instructions to do it)
18" pillow form

Directions:
1. From solid fabric cut:
 9-10 1/2" squares

2. From border/backing fabric cut:
2-18 1/2" X 22" pieces
2-2" X 15 1/4" pieces
2-2" X 18 1/2" pieces


3.After cutting, then follow the Cathedral Windows Basics Tutorial HERE using the size requirements listed below:
*Size Requirements for Cathedral Windows Pillow:
10 1/2"solid squares
3 1/4" window squares
5 1/4" inner squares (optional and not featured in the CW pillow photos)
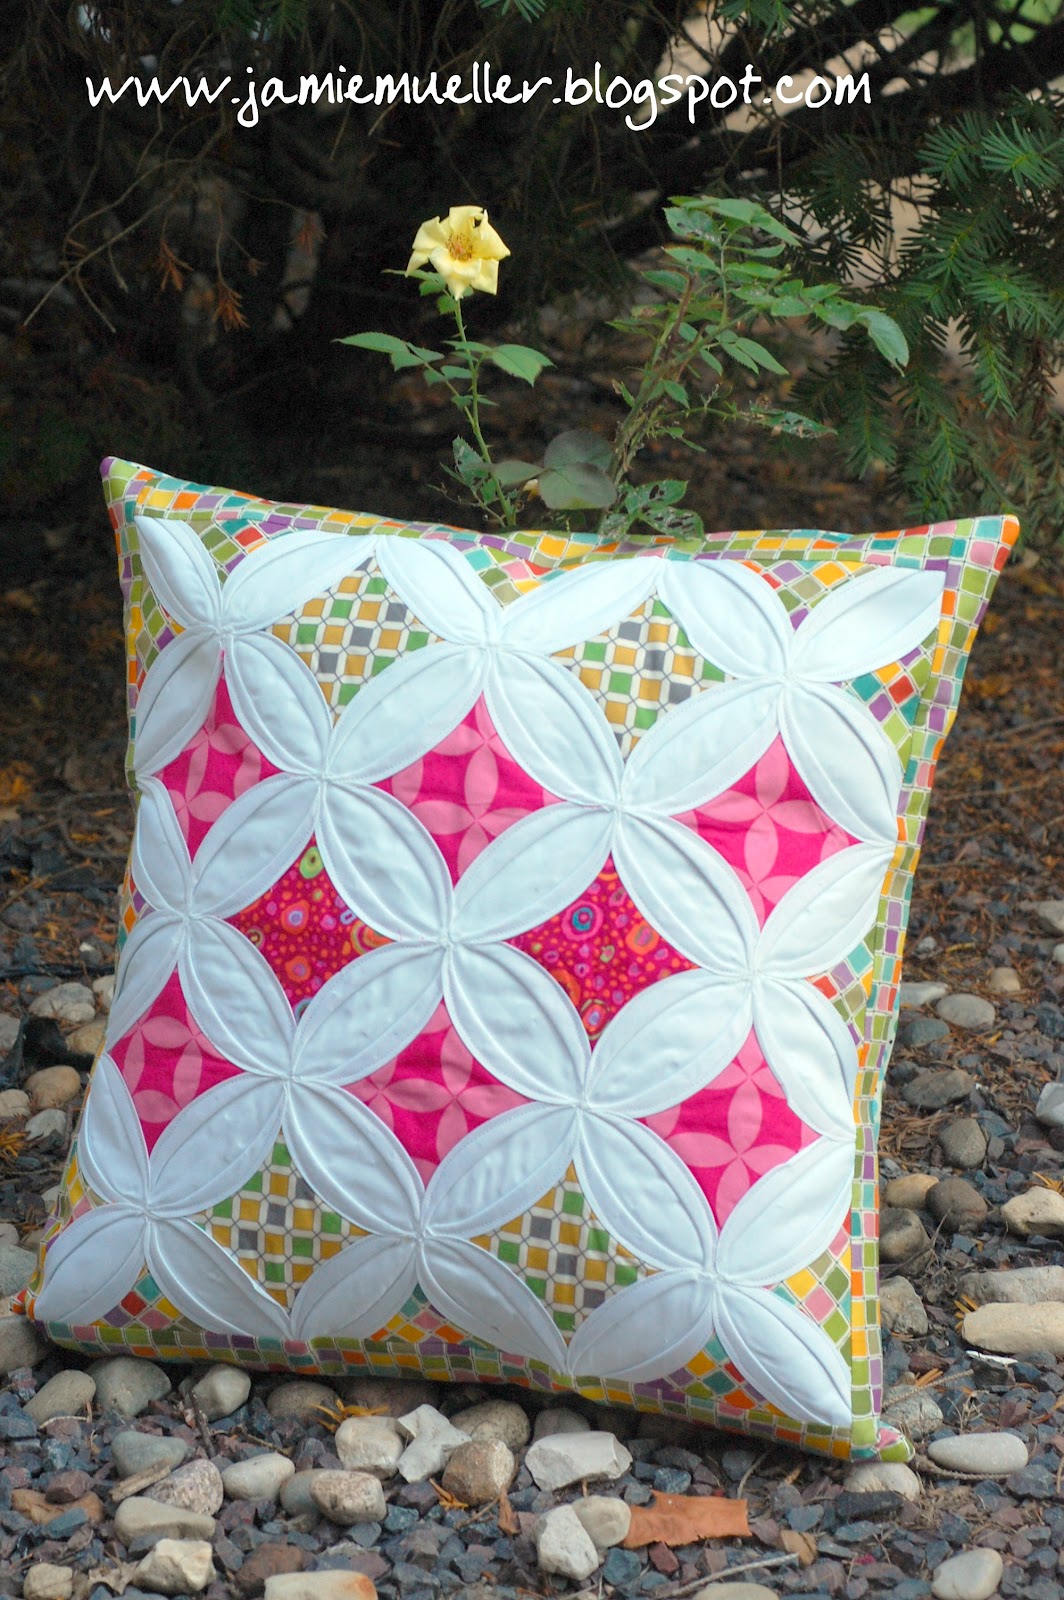
Pillow will be like a nine patch instead of a four patch. See photo


Borders:
1. Sew a 2" X 15 1/4" border strip to each side of the CW block. Press towards borders.

2. Sew a 2" X 18 1/2" border strip to the top and bottom of CW block. Press towards borders.

Pillow Backing:
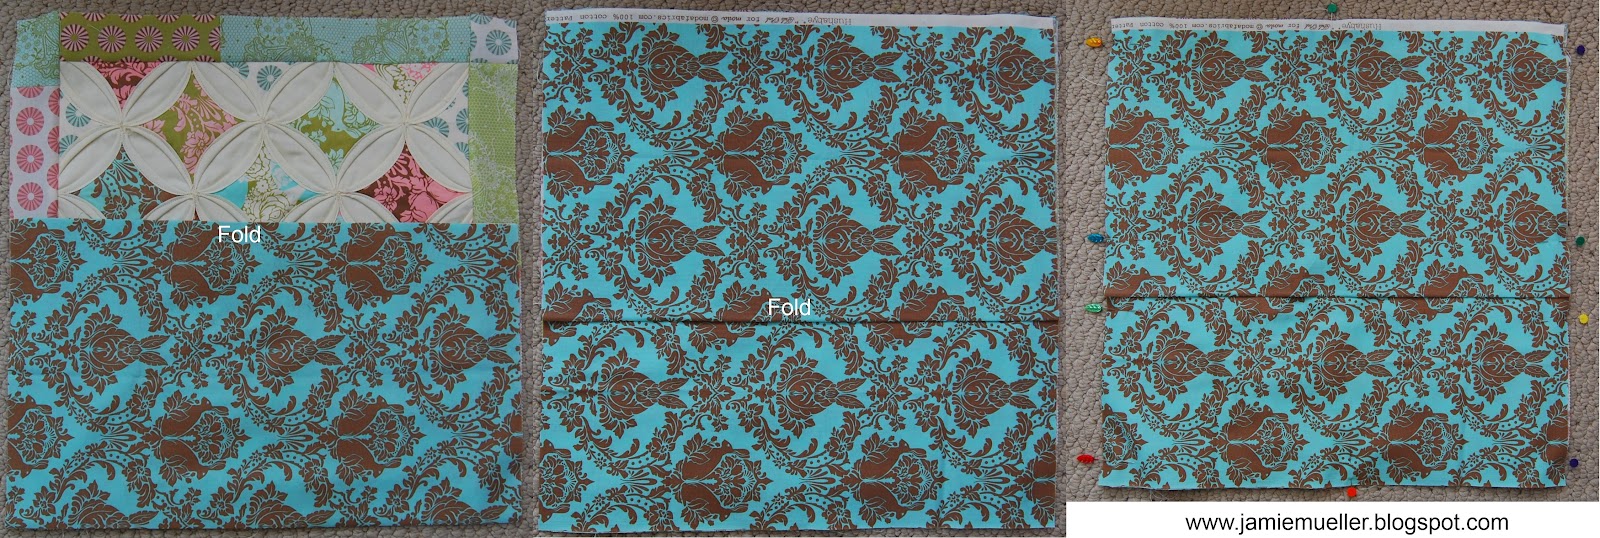
1. With wrong sides together fold each of the 18 1/2" X 22" rectangles in half crosswise to make 2- 11" X 18 1/2" pillow back pieces.

2.   With the CW pillow front facing up, overlap the 2 pillow back pieces so they measure 18 1/2" square with the folds in the center.   Pin and stitch all the way around using a 1/4" seam allowance. 

*Backstitch at the folds to make pillow more secure when inserting form.


Turn pillow right side out and insert pillow form!  Your pillow is finished!

Here are some photos of my Cathedral Windows Pillows! I can't wait to see yours!


Don't forget to add your completed photos to the Flickr Group or link up below!