Showing posts with label Brick Road Sew Along. Show all posts

Monday, May 20, 2013

Brick Road Sew Along Winners!

Thank you to everyone who participated in the Brick Road Sew Along! I had so much fun watching the progress with all of the photos in the Flickr Group; lots of beautiful quilts and fabrics!! I am using your Flickr usernames to announce winners. I numbered every photo in the Flickr Group and used good old random.org and the winner of the RJR fabric is.....Kathy Parks!!!
Congrats Kathy,  I will be sending you a message through Flickr soon, so be on the lookout!
 
 
And I decided to choose two winners for the SunFlower Quilts patterns!!
I will also be sending you a message through Flickr soon,so be on the lookout! You each get to choose one PDF pattern from our website! 


Congratulations to all of the winners and thank you so much for participating!! Click on their names to see their awesome Brick Road quilts!  Come back later this week and I'll show another quilt made with all RJR solids!
 

Tuesday, May 14, 2013

Binding Tutorial


Today we are going to talk about binding! I love binding so much, it's fun to make and I love being able to sit down on the couch and hand stitch the binding to complete my quilt! Let's get started...
 How much fabric do I need for the binding?
To figure how much fabric needed for binding (based on width  of fabric) take the total number inches of all four sides and add 15” (for turning corners and connecting ends). Take that measurement and divide by 42” (42” is the width of the fabric). That will tell you how many binding strips you will need and the amount of fabric yardage.
  Example: Brick Road Quilt Size: 63” x 78”
                     63 + 63 + 78 + 78 = 282” + 15” = 297” total
                     297 ÷ 42 = 7.071 (round off to next highest number)
                     You will need 8 binding strips
 
                     Cut binding strips 2 ½” (this is your preference, but I like to cut 2 1/2" binding strips, I find that this width works the best)
                     Multiply 2 ½” x 8 (number of strips = 20”)
                     You will need to purchase 5/8 yard (or 22.5”) of binding fabric
 
 Preparing the Binding:
  1. Cut 8 – 2 ½” x width of fabric strips. Before moving strips, cut off selvage.
  2. Take 7 of the strips and on one short end of each strip, fold a 45° angle towards the right, wrong sides together. Press. (the pressed crease will be your stitching line) See diagram.  

3. Lay one end of the strip not pressed right side up with 1 short end at top.
4. Open up one end of the pressed strips and lay on top (of strip from step 3) right sides together to the left side of the unpressed strip. Pin. Stitch on the 45° pressed line. See diagram.


5. Take the next 45° pressed strip, placing on the unpressed end of the previous sewn strip. Repeat until all strips are sewn to make one continuous strip.
6. Trim off excess fabric ¼” from seam of all sewn strips. Press all seams open. See diagrams.


7. Take the long continuous binding strip and fold in half wrong sides together. Press entire strip being careful not to distort.
8. Now you will square the binding strip to 1 1/8” wide by placing the 1 1/8” ruler line on the fold side of the binding strip. Trim off excess binding (raw edge). Do this for entire binding strip.. This is an important step to ensure a straight, even binding. See diagram.
       
      Sewing the Binding to the Quilt:

    2. Use a walking foot to attach binding to quilt to avoid puckering of quilt layers.
    3. Start on front of any side of quilt (not at a corner) by laying binding strip on edge with raw edges of binding on edge of quilt. Start by leaving 6” – 8” of binding as a tail that will be joined at the end. See diagram.
 
    4. Sew strip with ¼” seam allowances all the way to the first corner, stopping ¼” short of edge. Cut thread.  See diagram.

    5. Fold binding away from quilt to form a 45° miter at corner. Fold binding back over quilt square to the edge going down the next side. See diagram.

    6. Start sewing from the edge all the way down to the next corner. Repeat Step 5 for all corners and stop sewing 15” – 20” short of where you started.   See diagram.
 

    7. To connect ends, lay binding loose ends down on quilt and fold back leaving ¼” gap between folds. See diagram.
 

Cut one end off at fold on right side. Open out cut piece and lay under other folded side to measure cut line of left strip. To join, open right side strip end and lay right side up. Open left side and fold left end corner over wrong sides together and press as you did in joining strips together. Open, lay on other strip right sides together, pin, and sew on pressed line. Be careful not to get strips twisted. Cut off excess fabric ¼” from seam, press seam open and sew strip in half wrong sides together. Lay strip to edge of quilt and finish sewing down.  See diagrams.


    Hand Stitching Binding to Back of Quilt:
    1.       Hand stitch to back of quilt using hand quilting thread color that matches the binding fabric, being sure not to stitch all the way through to the front of the quilt. I like to stitch every 1/4" or so to secure nicely!
     
     
    Ok, that's it for the Brick Road Sew Along!  Now, go finish your quilts and upload them to the Flickr Group to be in the drawing for all of the awesome prizes including: RJR Fabrics and SunFlower Quilts patterns!!


    Thank you for participating in the Brick Road Sew Along and I've loved watching your progress and seeing your photos! 
    Also, a HUGE thank you to RJR Fabrics for the Cotton Solid Supreme fabrics, they are wonderful to work with and ya'll are great too! :)


    Monday, May 13, 2013

    Brick Road Sew Along Week 6: Machine Quilting


    Today we are going to focus on machine quilting. Let me begin by saying that I am by no means an expert, I've been machine quilting for a few years and these are just some tips and tricks that help me along the way.  I am just going to give some basic machine quilting advice.
    Two websites that I love are Angela Walter's and Natalia Bonner's.  They are both longarm machine quilters and have beginners FMQ books with lots of cool designs to try. Check out their books and websites and learn from them, they know a lot more than me! :)
     
     
    One BIG trick on becoming better at machine quilting is PRACTICE!!  Practice, practice, practice....the more you do it, the better you'll be!  I like to take larger scraps or FQs that I have laying around and make quilt sandwiches with them (backing/batting/top) and practice machine quilting on them.  Practicing on smaller pieces allow me to learn with ease instead of pulling a huge quilt through my machine.
     
    Some tools I like for machine quilting:
    Machingers Gloves
    These gloves are soft, light and have fingertip grips to help grip the fabric as you quilt. I'm sure there are many places online where you can buy them, and I know JoAnn's carries them (so grab your coupon and go pick up a pair!)

     
    Walking Foot
    I love using my walking foot when I'm straight line quilting.  A walking foot has feed dogs along the bottom, so that there are two sets of feed dogs pulling your quilt through for an ease while quilting.  If you don't have one already, I highly recommend getting one!

     
    Free Motion Quilting Foot
    A free motion quilting foot has a wider/open foot to allow for better vision while quilting.


    Straight Line Quilting:
     
    Straight line quilting is exactly what it says, it's quilting in straight lines. Straight line quilting is how I started machine quilting. It's one of the best (easier) forms of machine quilting for beginners.
    Depending on the quilt, you can decide how far apart you want to space your straight lines.
    Some tips:
    -I like to adjust my stitch length to either 3 or 3.5, I find that these to lengths make quilting much easier and I'm not having to pull on my quilt.
    -Use painter's tape, chalk, or water soluble pencils to mark lines to follow. If you use painters tape you can follow the edge of it with your foot or needle.
    -use a walking foot (for reasons above)

    Please ignore my dorky self on the videos....this was my first video so I say "um" a bit at the beginning....I'm sorry, it gets better! Don't you just hate seeing yourself on camera?
     
    This video is about straight line quilting and can be found HERE on our YouTube channel. I was going to upload the videos on this post but it was taking forever and there are three separate videos.
    So, please check out our YouTube channel to find all of these videos plus more!


    Free Motion Quilting FMQ:


    Free motion quilting is when you quilt freely. You are the one controlling your machine, design and stitches.  FMQ can be any design you wish.
    Some tips:
    -Before I start any new quilting design, I like to practice drawing it on paper first. This allows me to feel where the design is going and learn where to go so when I'm quilting on my actual quilt I can freely quilt around it. 
    -use your FMQ foot
    -feed dogs down
    -stitch length at 0, this allows you to control your stitches
    -start in the center of your quilt and go outwards. This allows you to smooth out your quilt as you go.
    -Start out slow when you first start FMQ. Your pedal (foot) and hands should be going at similar speeds, this will insure your stitches will be equal.

    The next video is pebble quilting and can be found HERE on our YouTube channel.

    The last video is swirl quilting and can be found HERE on our YouTube channel.

    So, hopefully you're still with me after those videos!

    Try one or all of these machine quilting techniques (or something completely different) on your Brick Road quilt and don't forget to upload photos to the Flickr Group! Just remember to relax and have fun!!!
    I will post a binding tutorial tomorrow; this post already seemed long enough!

    Next week, winners will be announced! Remember, you can only win if you've uploaded photos to the Flickr Group!
    Up for grabs, RJR fabric and SunFlower Quilts Patterns!

    Monday, May 6, 2013

    Brick Road Sew Along: Week 5

    Sorry for not having this post ready this morning....long, fun sewing weekend=tired Jamie!
     Let's get started! This week is backing/basting!
     
     
    Backing:
    1. Get your 4 yards of backing fabric and cut in half so you have 2-2 yard cuts (44" X 72") and cut the selvedges off.
    *NOTE: If you want a scrappier/pieced backing look, you could use 4 different 1 yard cuts!
     
    2. Then, take the 2-2 yard cuts and sew them together along one 72" side.  You will have one long 72" seam sewn where the selvedges used to be and have an approximately 72" X 82" piece. Press seam.
    *I pieced my backing to show you more colors of the RJR Crazy for Dots and Stripes fabrics, but as long as you have a backing piece at least 72" X 82" you'll be fine! Here is a photo of the RJR Crazy for Dots and Stripes fabrics I used: I LOVE THESE DOTS!
     
     
    Basting:
    1. Find a big open hard floor area to baste your quilt; you might need to move some furniture around.  I usually move my kitchen table to use the big hardwood floor space!
    2. With your backing fabric wrong side up, spread out on hard floor and smooth out wrinkles. 
    3. Using painter's tape, tape around the edges pulling the backing fabric tightly and making sure there are not any wrinkles or puckers.
    (Sorry, it was hard for me to get an entire backing picture because it's large and I'm short)

    (Ozzie wanted to show you where to tape to the floor)
     
    4. Then, spread batting out on top of backing fabric, smooth out any wrinkles and tape around edges.
     
    5. Next, spread quilt top on top of batting and smooth out any wrinkles.
    I don't tape my quilt top, because then I can adjust it while pinning if needed.
     
     
    Pinning your quilt:
    *There are many different ways to in your quilt, this is my method!
    What I use:
    I like to use curved safety pins with Paula Jean Creations covers on them, these covers make gripping the safety pins so much easier.


    I also like to use a Kwik Klip, this bad boy saves my finger tips from being sore while closing the safety pins and makes basting so much faster in my opinion. You can find more information about these products on Paula Jean Creations website!
     
    1. Using curved safety pins, baste your quilt together every few inches making sure to catch all layers (backing, batting and top).
    *I like to pin more rather than less to make sure I don't have any puckering while quilting. But it's your call on how much you pin.
     
     
    Ok, that's it on backing and basting! Come back next Monday for a machine quilting tutorial!!  Any requests on designs? 
    And make sure you add photos to the Flickr Group!
     

    Monday, April 29, 2013

    Brick Road Sew Along Week 4

    Everyone's blocks are looking great!! You still have plenty of time to catch up if you're behind, or if you're just joining us! This week we will add sashing, borders and assemble our entire quilt top! Let's get started!
     
    Cutting the Sashing:
    1. From the sashing/border fabric cut:
              20-1 1/2" X WOF (width of fabric) strips.
              2-7" strips
     
    2. Take 6- 1 1/2" X WOF and subcut:
               36- 1 1/2" X 7" pieces
     
    3. From the 2-7" X WOF strips subcut:
              8-6 3/4" X 7" pieces
     
    Sewing the Sashing:
    1. Choose 6 blocks and lay them out vertically with the shorter sides on top and bottom. Sew a 1 1/2" X 7" sashing strip to the bottom 7" side of the first block. Press sashing to block. Continue sewing a 1 1/2" X 7" sashing strip to the bottom of the next 4 blocks. *There should be sashing attached to 5 of the 6 blocks.


    2. Sew all 6 blocks together in a vertical row along the 7" sides. Press sashings to blocks. Repeat steps 1 and 2 to make a total of 4 vertical rows that measure 7" X 74 1/2".

    3. Choose 5 blocks and lay them out vertically with 7" sides on top and bottom. Sew a 1 1/2" X 7" sashing strip to the bottom 7" side of the first block. Press sashing to block. Continue sewing a 1 1/2" X 7" sashing strip to the bottom of the next 3 blocks. *There should be sashing attached to 4 of the 5 blocks.

    4. Sew all 5 blocks together vertically along the 7" sides. Press sashing towards blocks. Repeat steps 3 and 4 to make a total of 4 vertical rows that measure 7" X 62".

    5. Take a 6 3/4" X 7" piece and attach one to the top and one to the bottom of 1- 7" X 62" vertical row along the 7" side.  Press towards blocks.  Repeat on remaining 7" X 62" vertical rows. You should now have 8- 7" X 74 1/2" rows.


    6. Take the 14- 1 1/2" X WOF strips and sew two together along the short 1 1/2" sides to make one continuous strip. Repeat with remaining strips until you have 7- 1 1/2" X 84" strips. (Be sure to cut the selvedges off first)

    7. Measure all rows and cut 7- 1 1/2" sashing strips to that measurement. (Should be around 74 1/2") As long as your rows are all the same size, it doesn't matter if your measurement is a little off from mine, but it should be close to 74 1/2".

    8. Lay out the rows alternating as shown.

    9. Sew a 1 1/2" sashing strip to the RIGHT side of rows 1-7. Press to sashing strip.


    10. Sew vertical rows 1-4 together.


    11. Sew vertical rows 5-8 together.

    12. Sew all rows together from steps 10 & 11.


    Outer Border:
    1. Cutting the border fabric, cut 7- 2 1/2" X WOF strips.
    2. Take one 2 1/2" strip and cut in half. Sew one half along the short 2 1/2" end of 2 WOF strips. You will now have 2- 2 1/2" X 63" strips.
    3.Measure the center width of the quilt top and cut two strips to that measurement. Sew top and bottom strips on. Press to border.

    4. Sew 2 strips together along the short 2 1/2" ends. Measure center length of the quilt top and cut strip to that measurement. Repeat with 2 more strips.  Sew one strip to each side of the quilt and press to border.
     
    And now your quilt top is done! I'm sure they look awesome! I can't wait to see all of the tops so don't forget to upload photos to my Flickr Group!
     
    Here is the rest of the schedule...see you next week for backing!
     
    Week 5-May 6th: Prepare Backing/Basting
    Week 6-May 13th: Quilting/Binding
    Week 7-May 20th: Winners Announced
     
    Also, be sure to check out my Mirror Ball Dot Blog Hop Post HERE for a chance to win some fabric!


    Sunday, April 28, 2013

    Mirror Ball Dot Blog Hop & giveaway!

    Hello and welcome to the 2nd stop on the Mirror Ball Blog Hop!
     
    I think people know my LOVE for the awesome Mirror Ball Dot fabric by the wonderful designer Mark Hordyszynski for Michael Miller Fabrics, but in case you don't I LOVE THEM!!!
     
    The first round of MBD came out all the way back in 2007 with about 40 colors. I missed them the first round,I was graduating from college and getting married, so needless to say my plate was full! I saw them and instantly fell in love with them. I believe I came across a few bolts at a local quilt shop. I then began scouring the Internet trying to find as many colors that I possibly could. Then at Quilt Market back in Fall 2010 I "flirted" as much as I could with the President of Michael Miller Fabrics to get them reprinted. He said if I got enough people interested that he would consider it!  I went home that night at started a Flickr Group, made a paper petition as well and asked all of our loyal customers that came into the old shop (thanks again by the way and I miss all of you!) to sign it!  Then, about a year ago, I believe it was March 2012 I received an email from Mark telling me that they just introduced 5 colors of MBD and they were planning on launching 20 new colors!!  I can't begin to tell you how excited I was to get that email, I probably came close to peeing myself from excitement, that and being sleep deprived from having a newborn!!
     
    Anywho, I am so honored that Mark asked me to join the Mirror Ball Blog Hop and hope that ya'll like my projects! Plus, there's a chance for you to win some MBD awesomeness yourself!
     Here is the info for the blog hop straight from Mark's blog:
    "The concept was to get six designer/artists/bloggers - all Mirror Ball Dot enthusiasts - to work with the new color palette that was released last year. I limited the participants to four fat quarters of Mirror Ball Dot and one-quarter yard of 3 colors of Michael Miller Fabric's Cotton Couture. They were sent 1 yard of each color of Cotton Couture and were allowed to use their discretion in using it but just the same, I tried to limit what they were allowed to work with. The backing, batting, binding or other incidental materials were left to their choosing. Over the next 8 weeks we're going to share ideas, thoughts and tips on working with the shimmery, glimmery, pearlized, iridescent geometric fabric call Mirror Ball Dot. Each MBD Enthusiast will post on their respective blogs, so you're going to have to "hop" around, and at each stop you'll have an opportunity to win a Mirror Ball Dot color card and one Fat Quarter of 5 colors of your choosing of Mirror Ball Dot fabric. "
     
    For the MBD Challenge I came up with these fun iPhone Cases!

     
    The fabrics I chose were MBD: Princess, Citron, Luna and Starlight; Cotton Couture: Mist, plus Neon Lemon and Neon Pink
    I made 8 iPhone cases so I could showcase all of the fabrics I requested. I just love how they turned out and they go together really quickly! On the inside of the case, there is a place to hold your iPhone using elastic and there are pockets on the other side to hold your ID, credit cards and some cash. Then it folds up nicely to cover your iPhone while you're not using it. There is Peltex on the inside of the case to make it extra safe for your iPhone, since those suckers are make of glass! These are great for going out and holding all of your essential items without the hassle of carrying you huge purse.
    If you want to make one for yourself and all of your friends, you can purchase a pattern HERE! If you make one, send me a picture OR add a picture to my Flickr Group so everyone can see it!
     
    I love working with the Mirror Ball Dot fabrics! They are cotton quilting fabrics and the metallic shine is to die for and just simply stunning! When cutting them with a rotary cutter, the blade just glides through them like butter! I also liked working with the Cotton Couture and new Neons. The neon colors are so bright and fun and worked well for my project. The only thing is that they are pretty stiff. Being stiff actually worked very well for the iPhone case and I'm very pleased with the results! I didn't prewash them so I'm sure they would soften up if you did.
     
    I couldn't just make one thing for the Mirror Ball Blog Hop, so I also made a quilt using a FQ Bundle I had been hoarding for a while.

     
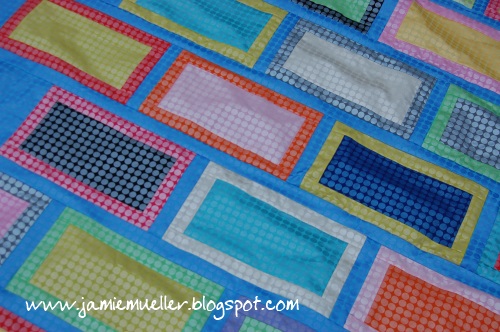
    This quilt is called Brick Road and I'm actually in the middle of the Brick Road Sew Along on my blog now! If you want to make one using your MBD fabrics, jump on in and sew along with us you still have plenty of time! There is a link in my header to hook you up with all of the instructions so far. It's just a quilt top right now, but I will be doing a tutorial on my blog on how to quilt it in two weeks as part of my sew along, so make sure to come back and check that out!
     
    Here are more photos of the projects I came up with:


    Ok, now is YOUR chance to get your hands on some MBD fabrics! What's up for grabs you say?
    There will be two lucky winners:
    1. will receive a MBD color card and 5 MBD Fat Quarters in your choice of colors!
    2. will receive a FREE iPhone case PDF pattern
     
    Simply leave a comment on this blog post and I will chose a winner next Sunday May 5th!

    Thanks for hopping to my blog and be sure to stop by all the other blogs during the Mirror Ball Blog Hop! HERE is a link to Mark's post with a list of all the blogs!