Wednesday, April 4, 2012

Cathedral Windows Pincushion #1 Tutorial


Cathedral Windows Pincushion #1 Tutorial
*this entire pincushion is a great scrap buster!

Supplies: to make a 5" pincushion
1- 10" square (solid fabric)
1-5" inner square (for peak-a-boo)
2-3" window squares
1-5" square for backing
stuffing (any stuffing will do, just use what you have on hand or your favorite kind)
1 Button for embellishment
Coordinating thread
Hand sewing needle

Directions:
Follow the Cathedral Windows Basics Tutorial HERE including the sewing embellishment (peak-a-boo) using the size requirements listed below:
*Size Requirements for Cathedral Windows Pincusion #1:
10"solid square
3 " window square
5" inner square
You will only need one folded square.


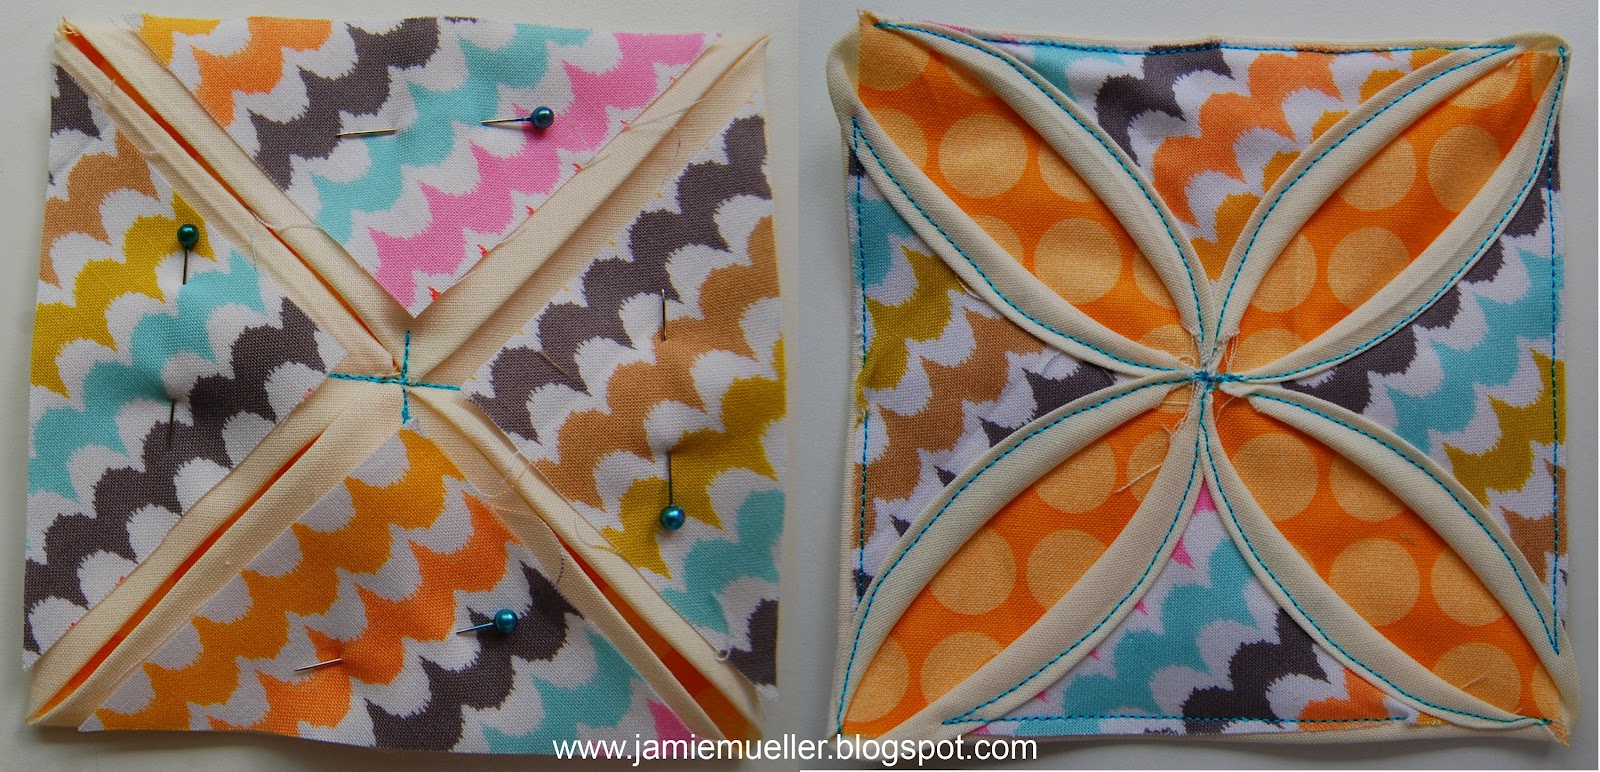
Assembling the Pincushion:
1. With backing square and CW square right sides together (RST) sew all the way around the squares leaving about a 2" opening for turning. 
2. Trim off corners being careful not to cut stitching. 


3. Turn pincushion right side out and stuff as desired.  Hand sew the opening closed.  Need help sewing your pincushion closed?  Check out my Mom's Ladder Stitch video tutorial over on her blog! It's a great, detailed tutorial and you won't see your stitches afterwards!


Adding a Button to your Pincushion:
1. With hand sewing needle and thread, start with a knot of top side of pincushion, close to the center.
2. Slide button on thread and cut off extra thread by the knot. (button will cover knot).
3. Bring thread through the other hole in the button and push through to the bottom of pincushion.
4. Pinch pincushion and repeat until button is secure.
See photo:


Your Cathedral Windows Pincushion is finished!  Here are some photos of my finished Pincushion! I can't wait to see yours!


Don't forget to add your completed photos to the Flickr Group or link up below!

Tuesday, April 3, 2012

Cathedral Windows Pillow Tutorial

Cathedral Windows Pillow Tutorial

Supplies: *to make an 18" square pillow
1 yard solid fabric
3/4 yd border and backing fabric
18- different 3 1/4" squares for windows (great for scraps)
9-5 1/4" inner squares (peak-a-boo option, I did not do this in the tutorial, but look here for instructions to do it)
18" pillow form

Directions:
1. From solid fabric cut:
 9-10 1/2" squares

2. From border/backing fabric cut:
2-18 1/2" X 22" pieces
2-2" X 15 1/4" pieces
2-2" X 18 1/2" pieces


3.After cutting, then follow the Cathedral Windows Basics Tutorial HERE using the size requirements listed below:
*Size Requirements for Cathedral Windows Pillow:
10 1/2"solid squares
3 1/4" window squares
5 1/4" inner squares (optional and not featured in the CW pillow photos)
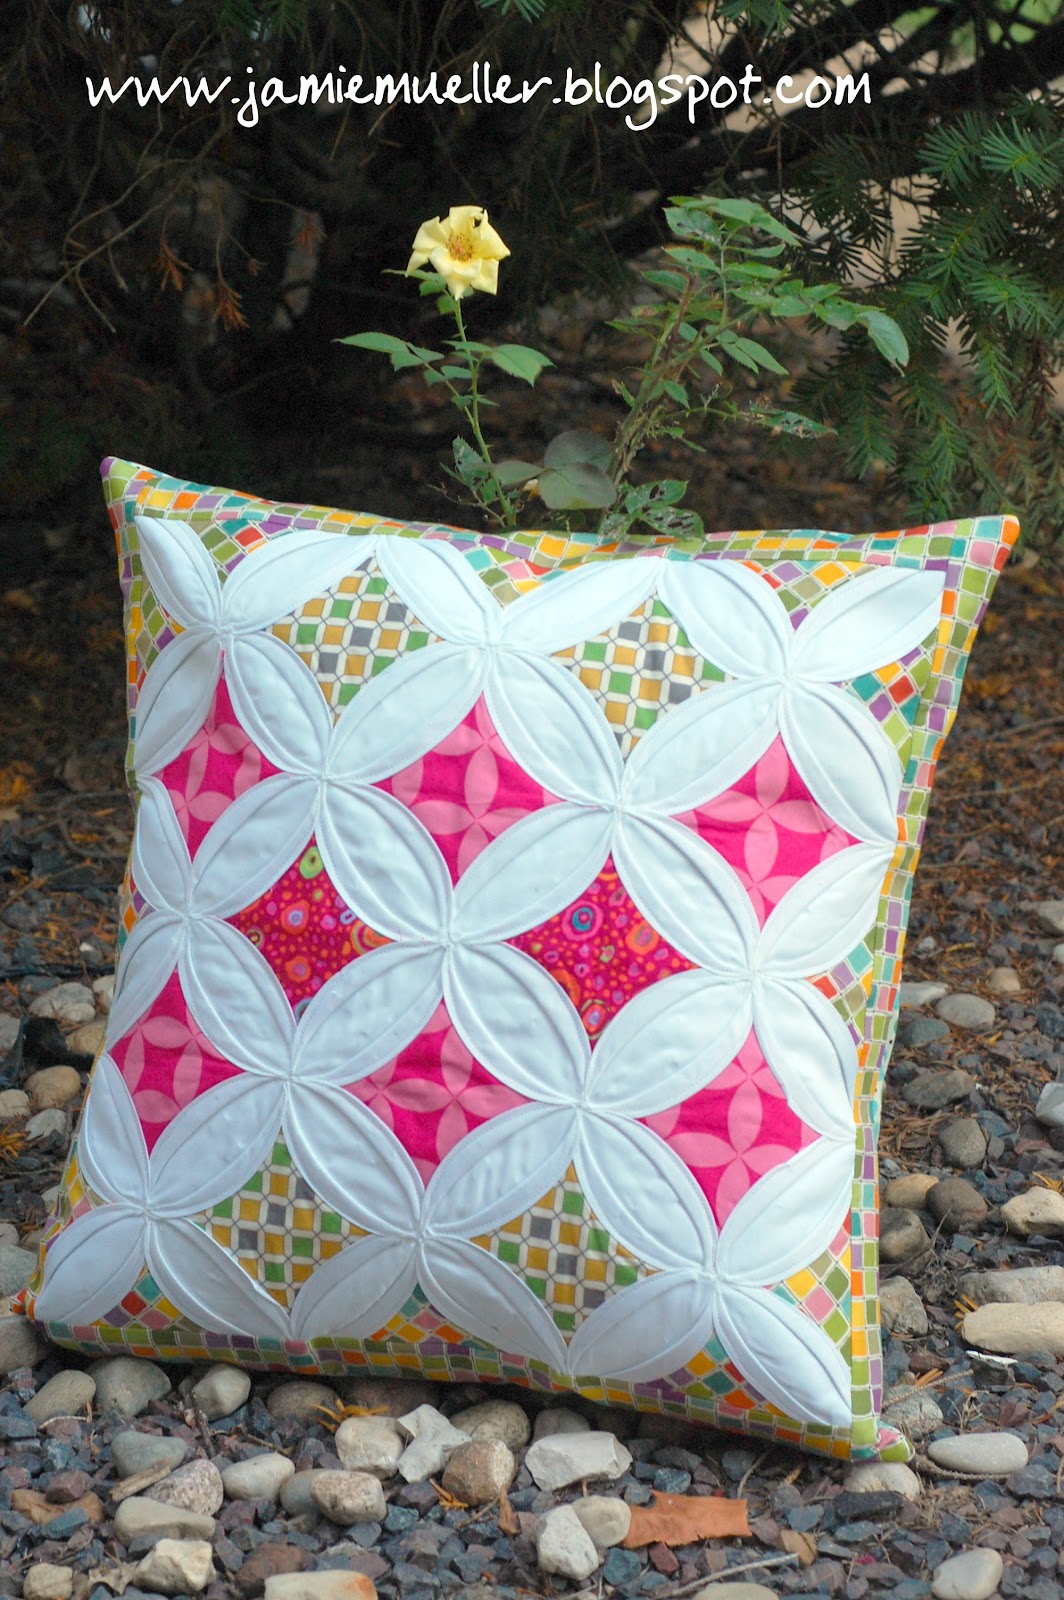
Pillow will be like a nine patch instead of a four patch. See photo


Borders:
1. Sew a 2" X 15 1/4" border strip to each side of the CW block. Press towards borders.

2. Sew a 2" X 18 1/2" border strip to the top and bottom of CW block. Press towards borders.

Pillow Backing:
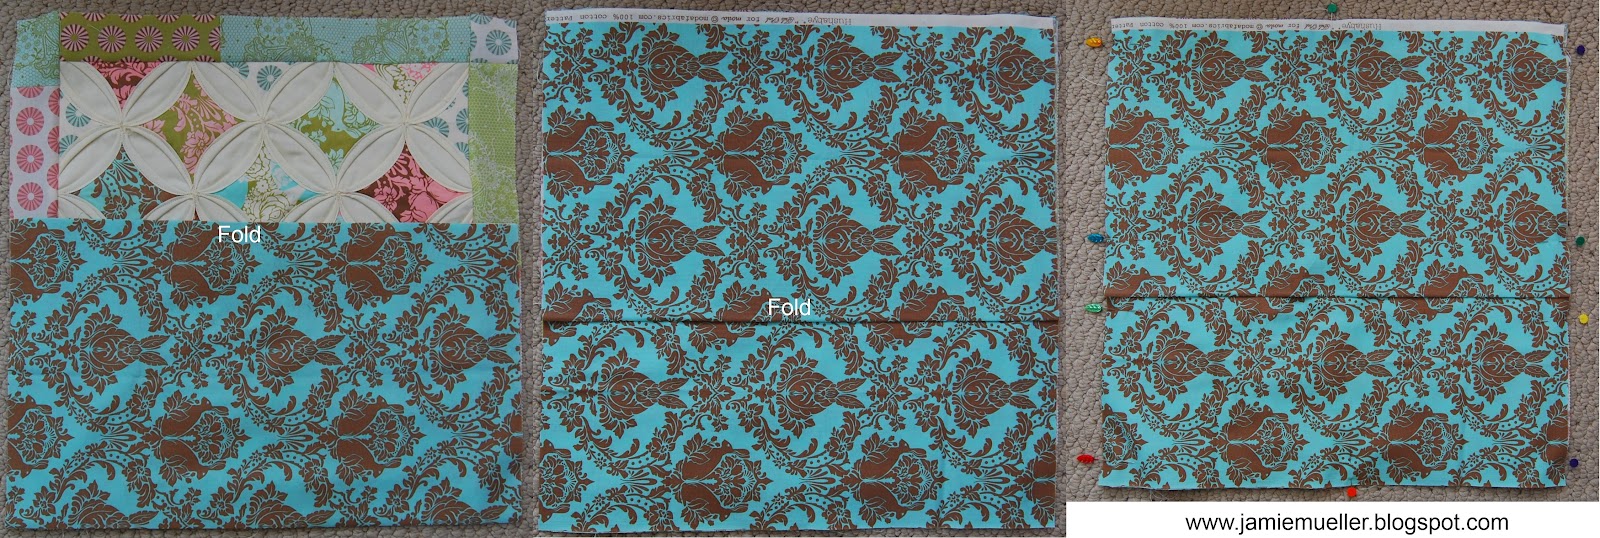
1. With wrong sides together fold each of the 18 1/2" X 22" rectangles in half crosswise to make 2- 11" X 18 1/2" pillow back pieces.

2.   With the CW pillow front facing up, overlap the 2 pillow back pieces so they measure 18 1/2" square with the folds in the center.   Pin and stitch all the way around using a 1/4" seam allowance. 

*Backstitch at the folds to make pillow more secure when inserting form.


Turn pillow right side out and insert pillow form!  Your pillow is finished!

Here are some photos of my Cathedral Windows Pillows! I can't wait to see yours!


Don't forget to add your completed photos to the Flickr Group or link up below!

Monday, April 2, 2012

Cathedral Windows Sew-a-long PRIZES!

So now that ya'll know the basic steps to the Cathedral Windows method and practicing away to get ready for all the fun projects, I would like to announce the PRIZES up for grabs! 

First, SunFlower Quilts has donated numerous patterns from the shop!  Check out all of our patterns HERE.


Second, Fabricworm has graciously donated a fat quarter bundle of  the 100% organic fabric line it's called Mod Squad by Dan Stiles for Birch Fabrics. Details on their website HERE. It looks like a super fun fabric line!


And last but certainly not least, Fat Quarter Shop has generously donated 3-$25 gift certificates to their shop for you to buy whatever your heart desires!


Can you believe all of these prizes?!?!  I am so excited and wish that I could win myself!

Thank you so much to all of these shops for your generosity and donating fun prizes for my Cathedral Windows Sew-a-longers to have a chance to win!!

How do you win you ask, here are the details:
 You must upload a photo to my Flickr Group of any project you make from my Cathedral Windows tutorials.  Or you can link your blog post featuring the Cathedral Windows project at the bottom of that tutorials post on my blog.  It can be from any of the projects over the next week and a half and there is NO limit to how many you can upload!  So if you make 20 pillows, 10 pincushions and a pouch, then you have 33 chances to win these fabulous prizes!
You have until the end of the month (April 30th) to submit photos and the winners will be announced on May 1, 2012!

Confused on Flickr or Linking?  Here are the details:
At the top of my page there is a link for a tutorial on how to start your own Flickr under my tutorials page.  That will take you to a google document showing you step by step how to create a Flickr account and upload photos, it's super easy!  You will need to create a Flickr account in order to add photos to my Flickr Group!

If you don't want to create a Flickr account, which I highly recommend it because it's a whole new world for quilting inspiration, you can also link a blog post from your blog at the bottom of each of the Cathedral Windows tutorials.  It's easy, at the end of each tutorial post on my blog there is a button that says add your link, all you do is click on that and add your information.  You must have a blog and create a post about your Cathedral Windows projects in order to be able to link.  In your blog post, you must include either a Cathedral Windows Sew-a-long button or a link back to my blog in order to be eligible for prizes!
Good luck to everyone and I CANNOT wait to see what everyone creates!
Don't forget to grab a button for your blog!

Cathedral Windows Sew-a-long


Cathedral Windows Basics Tutorial

okay ya'll,
this is a tutorial on the basics of Cathedral Windows.  I will show you step by step how to achieve Cathedral Windows but it will just be a sample and not really a project! This will be our practice windows; you could always turn this into a mini quilt/wall hanging! Tomorrow we will start the projects tutorials and I will teach you how to make an 18" square Cathedral Windows pillow!  Check the schedule HERE for all of the projects we will be doing in the next week and a half!


Cathedral Windows Tutorial
*Before starting the cathedral windows pillow pattern, always remember to PRESS the fabric and not IRON the fabric.  We don’t want the fabrics to stretch.  I suggest not using any steam while pressing as well. Also, make sure the square pieces are truly square. This will help a lot!
Materials:
1/4 yd solid fabric -cut into 4- 10" squares
8- 3" squares for the "windows" (these are a great use for scraps!)
Coordinating Thread (match the solid fabric)
Magic Sizing (or Starch of choice)  *I use the starch on the solid squares while folding, it really helps keep them stable and easier to work with!

Directions:
Folding:
*I spray starch lightly before each step of the folding process and find that it really helps keep the fabric stable and just makes it easier to work with!
1. Take one solid 10” square and fold in half. PRESS.
2. Fold that piece in half again and PRESS.

3. Open up the square and place a pin directly through the middle of the square.  You should easily find the middle by the creases made from folds.    

4. One corner at a time, bring one corner tip to the pin (or the center) and PRESS.  Repeat with all four corners.


5. Again, one corner at a time, bring one corner to the pin (or the center) and PRESS.  Repeat with all four corners.


6. Pin all sides down to hold in place.

7. Repeat with the remaining 10” squares until all your squares are complete.
*This folding step is what will take the longest, now comes the FUN part!
Sewing:
1  Sew vertically and horizontally across all four points in center to tack down points.

2. Set your sewing machine to have a small zigzag stitch.  (My machine was set to Width-2.5 and Length-1.0 if that helps)
3. Sew folded blocks together by placing two side by side and sewing with a small zigzag stitch together. The windows will cover up those stitches later, so don’t stress out too much on how they look!


4. Sew until you have a 2 X 2 square (looks like a four patch). 

5. Take 3” squares and pin in the center of the newly formed squares, covering up the zigzag stitches and removing all pins.
6. Take the remaining 3” squares and cut in half diagonally.  Next, on both bottom corners of triangles trim off 1/4". Place triangles on the outside triangles and pin in place.
*Trimming off corners isn't mandatory, but it will make it easier to sew.  If you don't trim them off they tend to make ugly little flaps (see photo below).


7. Starting with the center colored square, take one side and fold over towards the center.  Pin in place and repeat with all four sides. Continue until all squares are fully pinned.  The sides should naturally curve on their own, see isn't it much harder than it looks?
 (not necessary to pin before sewing, but highly recommended until you're fully comfortable with the technique. I forgot to take a photo of one fully pinned.)
8. Do the same thing with the outside triangles, instead only pinning down two sides instead of four.
9. Starting in the middle of the project, sew with a straight stitch on top of the solid fabric closest to the color part around all four sides.  Continue with all squares.

10. Do the same with the triangles, only sewing three sides instead of four.

* Here are photos of a way to sew around the entire project without picking up your needle once.  Having the needle down feature on your machine really comes in handy for this!  If you don't have it, no big deal, just remember to stop with your needle down before turning your project.
These photos might be a little confusing, don't let them overwhelm you, but you basically start in the center and go all the way around including the corners and end up back in the center.  It will make a lot more sense once you start actually sewing!  The first photo is if you're right handed and the second photo is if you're left handed.
RIGHT HANDED

LEFT HANDED


Sewing: Embellishment
*Here are directions if you want to add fabric underneath the windows for a little peak-a-boo surprise. See photo: The yellow dot fabric is the peak-a-boo surprise instead of being the solid cream color!

*This would be done before step 1 of the sewing directions above!

1.  Measure your folded square to determine size.  This would be a 5"square if you're using a 10" square to begin with.


2.  Open the top flaps of your folded square and insert your 5" square fabric and pin in place.


3. Then, sew vertically and horizontally across all four points in center to tack down points.


*Then continue on to step 2 of the sewing directions at the beginning of the tutorial!
Well that's it for the basic tutorial of Cathedral Windows! See, I told ya'll it's easier than it looks!  Please let me know if you have any questions!  See ya'll tomorrow!  Oh wait, check back later today for the announcement of all the fun PRIZES!

If you make a sample block from these instructions please add your link here to your blog post and add it to the Flickr Group!


Sunday, April 1, 2012

Cathedral Windows Sew-a-long Schedule

Okay ya'll, tomorrow is day one of the Cathedral Windows Sew-a-long!! Who is ready for some fun?  I just love making Cathedral Windows and I hope that ya'll will too after this!  Don't be scared, they are easier than they look, I promise!  You can do it! I am so excited and I hope ya'll are too!
I will post a tutorial for a bunch of projects including a pillow, some pincushions, a pouch, plus more! The basic instructions for Cathedral Windows are all the same but with different size requirements.  The "windows" part are a great use for scraps you have been wanting to use! 
PLUS, later on this week, I will be announcing some huge PRIZES for everyone who participates in the Sew-a-long!  Just a little tease, Fat Quarter Shop and Fabricworm donated some fun stuff (more on that soon). 
In order to win prizes you must submit photos of Cathedral Windows projects either in my Flickr Group or link it back to the blog post of that project (which I will tell you how to do at the end of every tutorial blog post).
Here is a little schedule of how these couple of weeks are going to go:
Monday April 2nd: Basics of Cathedral Windows Step by Step Tutorial (these basic instructions will be used for every tutorial, each tutorial will have different size requirements listed) Prizes announced today as well!
Tuesday April 3rd: Pillow Tutorial
Wednesday April 4th: Pincushion #1 Tutorial
Thursday April 5th: Pincushion #2 Tutorial
Friday April 6th: Coasters Tutorial
Saturday April 7th: Pouch Tutorial  AND (Happy Birthday to my Husband Jon)
Sunday April 8th: Happy Easter!! Jesus is RISEN! Day off so we can all celebrate and eat lots of yummy food and candy!
Monday April 9th: Turtle Pincushion/stuffed animal
Tuesday April 10th: Ornament-guest blogger Jill from Constantly Quilting
Wednesday April 11th: Tote Bag Tutorial
Thursday April 12th: Journal Cover Tutorial
Monday April 30th: Deadline to submit project photos for a chance to win prizes!
Tuesday May 1st: Announcing Winners of the awesome PRIZES!

WOW, that's a week and a half of Cathedral Windows fun I have scheduled with 9 projects! I've been sewing like crazy for ya'll and taking lots of photos! I can't wait to see what ya'll come up with and I can't wait to start, see ya'll tomorrow!

Don't forget to grab a button for your blog and join the Flickr Group so you can add photos of your Cathedral Windows projects!